
I’m back in Singapore and away from my desktop, which has meant not being able to play any of my more demanding or Windows-only games on the computer I actually have here (a MacBook Pro). I gave GeForce Now a shot, but given that they didn’t have any servers in the region, the latency made things quite unplayable. It also didn’t look very good, most likely for the same reason.
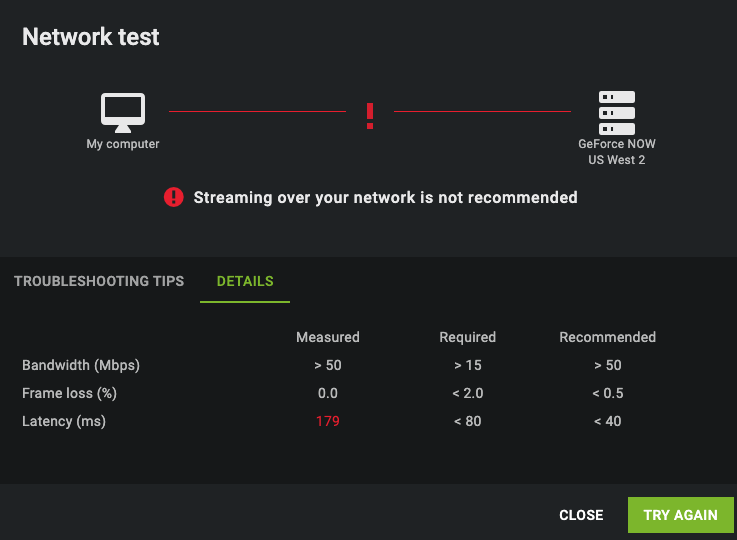
They’re really not kidding.
I came across this 2015 guide to running an EC2 instance for gaming via a Telegram group chat, and gave the pre-built AMI a shot. I wanted to use Parsec instead of Steam In-Home Streaming, though, since I was interested in playing a game which wasn’t on Steam (and I forgot that you could just add the game to Steam and play it that way). Unfortunately, out of the box, Parsec wouldn’t work - it came back with an error saying the encoder couldn’t be initialised, which I guessed was because of severely outdated graphics drivers. I didn’t manage to get newer ones to install, so I decided to start over from scratch, following a 2016 guide instead and riffing on it to modernize things a little.
The result is a set-up that lets me play The Division 2 at about 50ish FPS on High-ish settings at 1440p, and XCOM: Chimera Squad at 60 FPS on maxed-out settings at the same resolution. Latency is pretty good in that I don’t notice it at all, though when playing The Division 2 I get occasional issues where everything freezes before catching up; this literally happens to me on my actual desktop too, though, so I’m not too fussed there. Maybe it’s just that game.
It’s also not the exact same in terms of visual fidelity as playing on identical settings on a “real” machine in front of you - it’s a little bit off since you’re pretty much watching a video of the game running - but it’s still better than nothing, and the difference isn’t that jarring.
The cost of running this varies based on the bandwidth needed to stream and how long you play - any games which have a lot of motion going on will be higher-bandwidth than ones which are relatively static, and your resolution is going to affect this too. It seems to have come out to approximately a (US) dollar per hour for me so far, which is close enough to what I remember the cost of going to a LAN shop being (albeit almost two decades ago). Plus those are closed now given everything going on in the world, and I can do this while at home.
So. Here’re the steps I followed. This is again adapted from this guide, which is worth checking out as well for more details on how AWS pricing works.
Creating the Instance
- First, select an appropriate region within the AWS console. You’ll probably want to use
CloudPing.info to find the one with the lowest latency. Since I’m
in Singapore, I chose
Asia Pacific (Singapore), also known asap-southeast-1. - In the EC2 dashboard, click either of the
Launch Instancebuttons. - Choose the
Microsoft Windows Server 2019 BaseAMI. - Filter the instance list by GPU Instances, then select a
g4dn.xlargeinstance. This is a 4-core, 16 GB RAM instance with an NVIDIA Tesla T4 GPU which is (so far) good enough. - Tick the
Request Spot instancesbutton, then enter a maximum price of one cent more than the current price shown (rounded down). As of this writing inap-southeast-1the current price is $0.4048; I would enter $0.41 here. - On the Add Storage screen, leave the default storage size of 30GB unchanged. We’ll talk about this later.
- Skip the Add Tags step, unless you have a use for it. I didn’t.
- Create a new security group to enable yourself to access the machine. My ISP gives out static IP addresses, so I created one which just allows all traffic from my IP.
- Launch the instance and connect to it. The Connect dialogue on the EC2 dashboard should provide
instructions on how to get the Windows login password using a key pair. After doing so, I used Microsoft Remote
Desktop with the
AWS-provided RDP file. If you’re on Windows, you can use Remote Desktop (open Start, then type
Remote Desktop Connection) - I haven’t tried this, though.
Setting up Parsec
Right now we have a machine up and running, but it’s not actually in a game-ready state. We’ll want to get graphics and sound drivers installed, as well as Parsec, which’ll let us connect to it with better latency than Remote Desktop.
- Parsec provides a handy installation script which does all the hard work for us. Follow the instructions there and log in to Parsec when it’s installed.
- Open Parsec’s settings and enable x265 streaming under the Host tab (and do the same on your computer, under Client). This’ll make things look better while using less bandwidth, which is great for us. You may also want to tweak the Bandwidth Limit if you find things look a little blocky when playing (later), or if you don’t mind trading off some visual quality for less cost (or the other way around). I bumped mine from the default 10 mbps to 30.
- After running the GPU updater and rebooting the instance, check that you can reconnect using Parsec on your own computer - the instance should pop up there after a couple of minutes. Do not use Remote Desktop to connect first; if you do, you’ll have to reboot again in order for Parsec to work.
At this point, you can also go ahead and install the game store of your choice - Steam, uPlay, Origin, etc. Even Epic if you want. Whatever works for you.
Preparing an AMI of Our Own
Since we’re not going to keep the instance up all the time, we’ll prepare an AMI that’ll let us create a new one with everything set up just the way we have it now.
The aforementioned guide I was basing this off of said to do this before installing any games, which gives us a clean slate AMI - you’d then create a new AMI for each game you want to play (after installing it). This is to help keep costs down, since you’re charged for EBS storage based on the size of the instance’s disk while it’s running. Having game-specific AMIs with smaller disks means you pay less than if you have all your games in a single one with a large disk.
Interestingly, and at least according to the same guide, storage of the AMI itself is charged
somewhat differently: you’re only charged for actual data being used and not the size of the disk.
You also only pay for the delta between the base AMI and the child one - in our case here, we’d pay
only for the size difference between what’s on disk in our current “base gaming” AMI and Amazon’s
Microsoft Windows Server 2019 Base one, as well as the difference between our game AMIs and the
“base gaming” one1.
For now, we’ll just create the base AMI and we’ll talk more about creating game-specific ones later.
- Back in the EC2 dashboard, right click the running instance, select
Image, then clickCreate Image. Give it an appropriate name (I called mineBase Gaming VMjust like the other guide). - Terminate the instance and wait. You don’t have to have the instance running while an AMI is being built from it.
That’s it.
Installing Games
To install a game, we’re going to go through most of the same steps that we went through to create the first instance, though we don’t need to go through setting everything up again.
- Click
Launch Instance. - Select the AMI you just created from
My AMIs. - Select the
g4dn.xlargeinstance type. - Choose
Request Spot instancesand type in an appropriate max price. - On the
Add Storagescreen, increase the size of theRootvolume to an appropriate size to be able to store your game. - Skip the
Add Tagsscreen again, or if you have a use for it, do what you want to do here. - Choose the security group you created before.
- Launch the instance and connect to it using Parsec when it appears there.
- Hit Start and type
Disk Management, then select theCreate and format hard disk partitionsoption. - You’ll be prompted to initialize something or another. Accept.
- Right-click the existing
C:/drive, then selectExtend Volume. By default it should opt to fill all the remaining space, so all you should need to do here is confirm. (If it doesn’t, adjust the options so it does.) - Install your game.
You’ll then want to go through the AMI creation process again, this time creating an AMI specific to
the game. I name mine with the date and the name of the game (e.g. 2020-04-27 Division 2). You’ll
also have to create a new AMI each time something on disk changes that you want to persist through
to the next time you launch an instance. For most modern games with cloud save, this will just be
every time the game is patched (so as to avoid having to repatch each time); for older ones without,
you’ll have to do this every time you’re done playing as well unless you want to lose all your
progress. If you upgrade the GPU drivers, it’s the same deal.
When you do create an “updated game” AMI, you’ll want to deregister the old one and delete the associated snapshot so you don’t keep paying for them.
- Go to the
AMIspage underImageson the left side bar. - Right-click the old AMI and select
Deregister. - Click on
Snapshotson the left sidebar, underElastic Block Store. - Find the snapshot you want to delete, then right-click it and select
Delete. Usually the creation timestamp is good enough to be able to figure out which snapshot is the correct one, but you can also cross-reference the AMI ID in the description if you’re having trouble (make a note of that before deregistering the AMI!)
Actually Playing
Go through the same steps as the previous section, but choose the game’s AMI instead. You don’t need to tweak storage, go through Disk Management, or install the game again. Connect using Parsec once the machine pops up there and start playing.
One disadvantage of us running a Windows spot instance is that as of this writing, AWS charges for the entire hour of usage instead of doing per-second billing like Linux spot instances. Which means that if you play for a little over an hour and terminate the instance, you’re still getting billed for two full hours.
Exactly like a LAN shop, I suppose. There might be a way to do all of this on Linux to save even more money, but I haven’t tried it; Parsec doesn’t support non-Windows hosts, so you’d have to set up everything manually and probably use Steam instead.
-
I’m not super familiar with AWS and its pricing, so if I got something wrong here please feel free to reach out with a correction. Hit the
Aboutlink in the site header to get in touch. ↩︎